Apache handlers control how the Apache web server software manages certain file types and extensions for your site. Apache comes configured to handle CGI scripts and server-parsed files. You can configure Apache to handle a new file type with an existing handler by manually adding the handler and extension below. For example, to have the server treat files with the extension .example as CGI files, you would type “cgi-script” under Handler and “.example” under Extension(s).
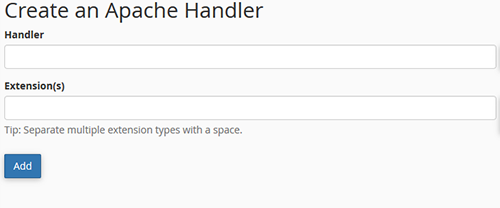
In order to add a handler, simply enter the handler name and then add the extension for the handler. You can add multiple extension types by adding a space between them. Once you have entered in your handler and extensions, just click the add button. You should see the newly created handler listed at the bottom of the screen.
]]>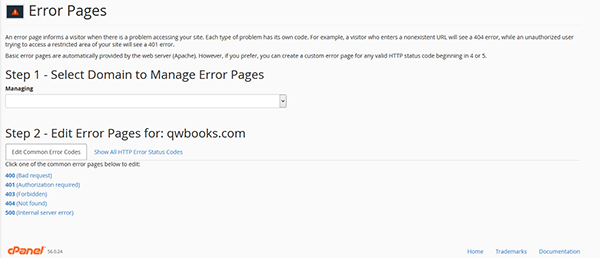
The error pages screen allows a client to modify or create error pages. There is a two-step process. First select the domain which holds the error page you would like to change. Then select the error page you want to modify or create a new error page. It is important that you understand how to use error codes.
]]>
MIME types tell browsers how to handle specific extensions. For example, the text/html MIME type equates to .htm, .html, and .shtml extensions on most servers, and this tells your browser to interpret all files with those extensions as HTML files. You can alter or add new MIME types specifically for your site (note that you can not alter the system defined MIME type values). MIME types are often used to handle new technologies as they appear. When WAP technology first appeared no one had these extensions set up on their server. With MIME types, however, you could have set it up yourself and begun serving WAP pages immediately.
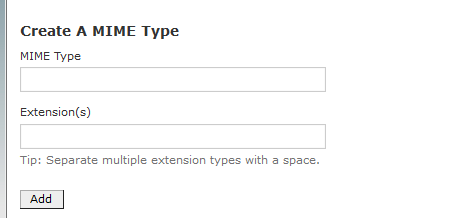
In order to add a MIME, simply enter the MIME type and then add the extension for the MIME type. You can add multiple extension types by adding a space between them. Once you have entered in your MIME’s and extensions, just click the add button. You should see the newly created MIME listed at the bottom of the screen.
Cron jobs allow you to run commands to do certain tasks, during defined times, such as sending notification. Understanding Linux will help you to effectively create cron jobs. If you are having trouble with creating cron jobs please contact Qdhosts.
Setting up a cron job:
- Look for the Advanced section of your Cpanel and click on Cron Jobs.
- Select your mode (Standard or Advanced)
NOTE: The standard option is the norm mostly because of its ease of use and pre-sets.
- Enter the email address where the cron will send your report.
- Enter the command you want to run in the command to run field
- Select how often the command should run by entering the time frames using the labeled boxes.
- Click save to complete your cron job setup.
NOTE: To delete a cron job click the delete button next to the cron job you need to remove.
]]>The indexes options allows you to setup the way folders are listed on your website. You can select a indexing style or choose to have no indexing at all. Just click on the settings option to make the change.
]]>There will be two option is track DNS. The first option is called domain lookup. The Domain Lookup tool allows you to find out the IP address of any domain, as well as DNS information about that domain. This can be a very useful tool right after your site is set up or after DNS changes have been made to make sure your DNS is setup properly. Simply enter in the domain name you want to look up and the system will list the IP address and DNS information.
The second is trace route. This function allows you to trace the route from the computer you are accessing cPanel from to the server your site is on (i.e. the number of servers and what servers your data must pass through to get to your site).
]]>